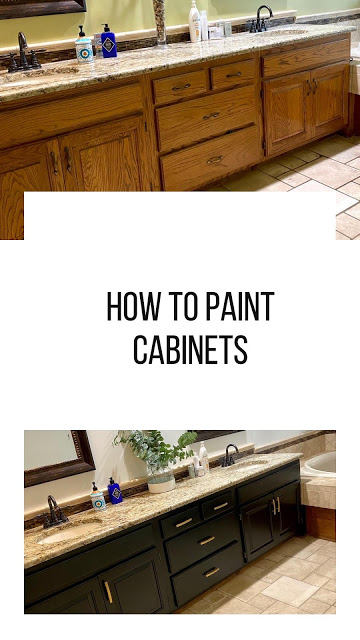
Isn’t it amazing what a little paint can do!? It’s an easy, and overall affordable, way to make a big impact.
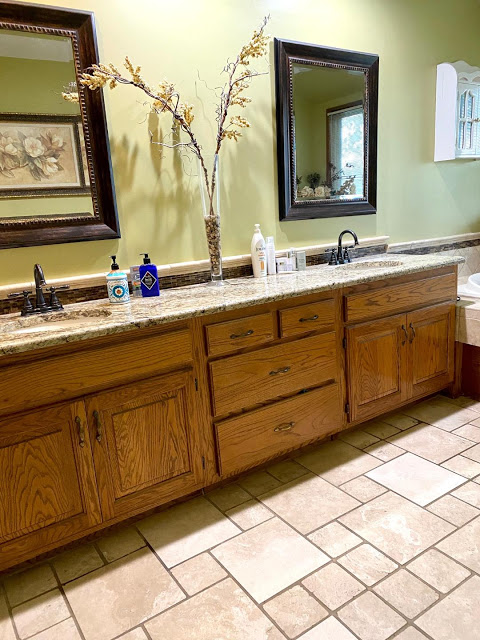
This bathroom counter was beyond due for a makeover. About 10 years ago we had our bathroom partially renovated but ended up leaving the cabinets as they were. Lately I noticed they were looking very outdated and really darkened our bathroom.
When I shared on stories about this change, there were lots of requests for a detailed step-by-step tutorial of what I did. It’s actually pretty easy. Just one of those projects that take a while because of drying time.
So easy – I’m already planning to paint the cabinets in all the kids bathrooms.
Remove doors and take off all hardware.
Wipe down to remove any dust.
I laid down a large drop cloth, set up a large folding table with another drop cloth on top to lay all the cabinets on for painting. You definitely want them on a flat, even surface.
Time for primer!!
I chose not to sand.
I’ve heard mixed reviews on this. Some say you don’t need to sand if you use the right kind of primer, others say definitely to sand. So – up to you and probably depends a lot on the condition of what you’re painting!
Here is the exact primer I used. Fast-drying and adheres to glossy surfaces. I ended up doing 2 coats of primer as I wanted to make sure I created a smooth, even surface before painting. I applied the primer with a brush and didn’t make each coat too heavy.
Be sure it’s completely dry before painting.
Now the fun part – paint!
Once again I used a brush to paint the cabinet frame, sides of cabinet doors, and all detail areas. Then I highly suggest using a small roller for the cabinet fronts to get a completely smooth finish.
After talking through the project at the paint store, it was highly recommended to me that I use a self leveling paint. But there are a few tips for using this paint. First being to apply it in thin coats on the cabinet frame. If you paint it on too heavy, it will start to drip as it dries. Then you’re stuck with those drip marks. So I really made sure not to go too heavy and I took the time to go back over it a couple times to really smooth it out. Then on the cabinet doors, make sure they are completely flat so it dries nice and smooth. I did roll it on a tad heavier to the cabinet door fronts. The last tip with this paint is to let it dry an extra long time between coats as it is a slow drying paint. I let mine dry overnight. I did apply 2 coats of paint.
BEFORE:
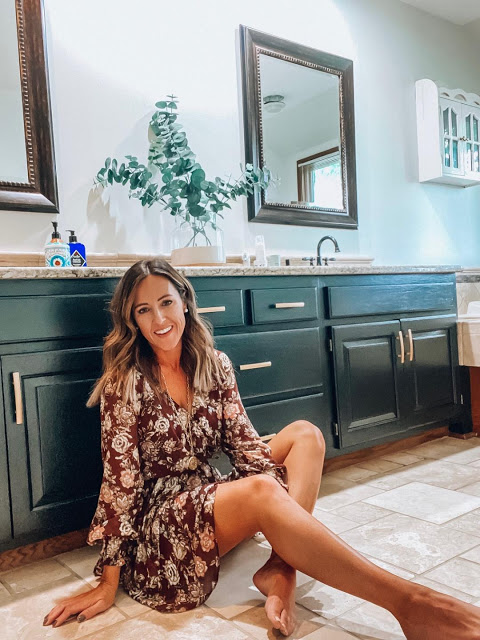
AFTER:

Exact color I used for the cabinet: Benjamin Moore Black Satin (2131-10)
I had quite a few questions in regards to the hardware. You guys – I stumbled upon these at Lowes when I was grabbing new paint brushes for this project. Here are my gold cabinet pulls and they are each just $4!! So pretty and pop against the black.
Wall color: Benjamin Moore Cloud Cover (OC-25)
Stay tuned as I’ll be sharing more of the bathroom decor details in the next week or so!